Documentation
Setting up the integration
Every screen Home Assistant shows when you add the Heat Pump Cost Optimizer, in the order you meet it, with a picture of each. Quick setup — the recommended route — asks one page of questions plus an automatic read of the heat pump's own entities; the full wizard is one menu entry later, and everything either path sets can be refined afterwards in Options.
This page is the journey. For what every field means — defaults, ranges, and the options pages you return to later — see configuration.md, which follows the same order the UI does.
The pictures below are generated renders built from the integration's own form definitions and English texts, so they show the questions and answers exactly as the flow asks them. They are not photographs of an install, and no real home's data appears in them.
- Before you start
- Adding the integration
- Screen 1 · Price source and weather
- Screen 2 · Optional sensors
- The choice: three ways to finish
- Quick setup (recommended)
- Continue setup — the full wizard
- Finish setup now
- Already have an entry?
Before you start
Have two things to hand:
- Electricity prices. Either a Tibber account with an API token (create
one at developer.tibber.com), or a Home
Assistant price sensor such as Nord Pool exposing
raw_today/raw_tomorrow. - A weather entity. The optimizer plans 24 hours ahead, so hourly forecasts are the one input it will not proceed without. Met.no or similar is fine.
Everything else — indoor and outdoor thermometers, tank probes, a power meter — is optional and can be pointed at later from the options pages.
Adding the integration
Settings → Devices & services → Add integration → Heat Pump Cost Optimizer (from the Home Assistant Marketplace on 2026.11 and later, from HACS before it, or a manual install; see the README for all three).
The first two screens are the only required answers in the whole flow. After them, the flow asks how you want to finish, and each of the three answers still ends with a working entry. The whole flow, as the integration walks it:
flowchart TD
    A["1 · Basics<br/>name, price source (Tibber token or price entity),<br/>weather entity"] --> B["2 · Optional sensors<br/>temperatures, on/off switch, solar,<br/>tank probes, pump signals"]
    B --> M{"3 · Finish setup now? A menu:<br/>Quick setup (recommended) ·<br/>Continue setup · Finish setup now"}
    B -. "only if another entry turned the pre-fill<br/>offer on and a device qualifies" .-> P0["Heat pump entities<br/>read from a device<br/>(leave the pick empty to skip)"]
    P0 --> M
    M -- "Quick setup (recommended)" --> Q["Quick setup<br/>five house toggles and<br/>the building questionnaire"]
    Q --> P["Heat pump entities<br/>read from a device<br/>(leave the pick empty to skip)"]
    P -- "back to the menu,<br/>without Quick setup" --> M
    M -- "Finish setup now" --> R["Review and confirm<br/>(read-only summary)"]
    M -- "Continue setup" --> T["4 · Temperatures<br/>target, band, day and night comfort,<br/>day hours"]
    T --> C{"5 · How do you want to<br/>describe your building?"}
    C -- "Describe my building<br/>(recommended)" --> E["Questionnaire<br/>structure, era, foundation,<br/>heated area, emitters"]
    E --> F["Heat pump basics<br/>nominal COP,<br/>max power, min power"]
    C -- "Enter thermal values<br/>directly" --> G["Thermal model<br/>masses, loss coefficient,<br/>COP, power limits"]
    G --> H["Two-zone and solar<br/>per-floor masses, buffer tank,<br/>windows, orientation"]
    F --> I["6 · Hot water<br/>tank, setpoint, time frames,<br/>anti-legionella"]
    H --> I
    I --> K["7 · Weather sensitivity<br/>wind and rain"]
    K --> R
    R --> J(["Confirming creates the entry:<br/>the first plan is solved within<br/>one optimization interval"])
Every route ends on the same read-only review screen, and confirming there is what creates the entry.
Screen 1 · Price source and weather
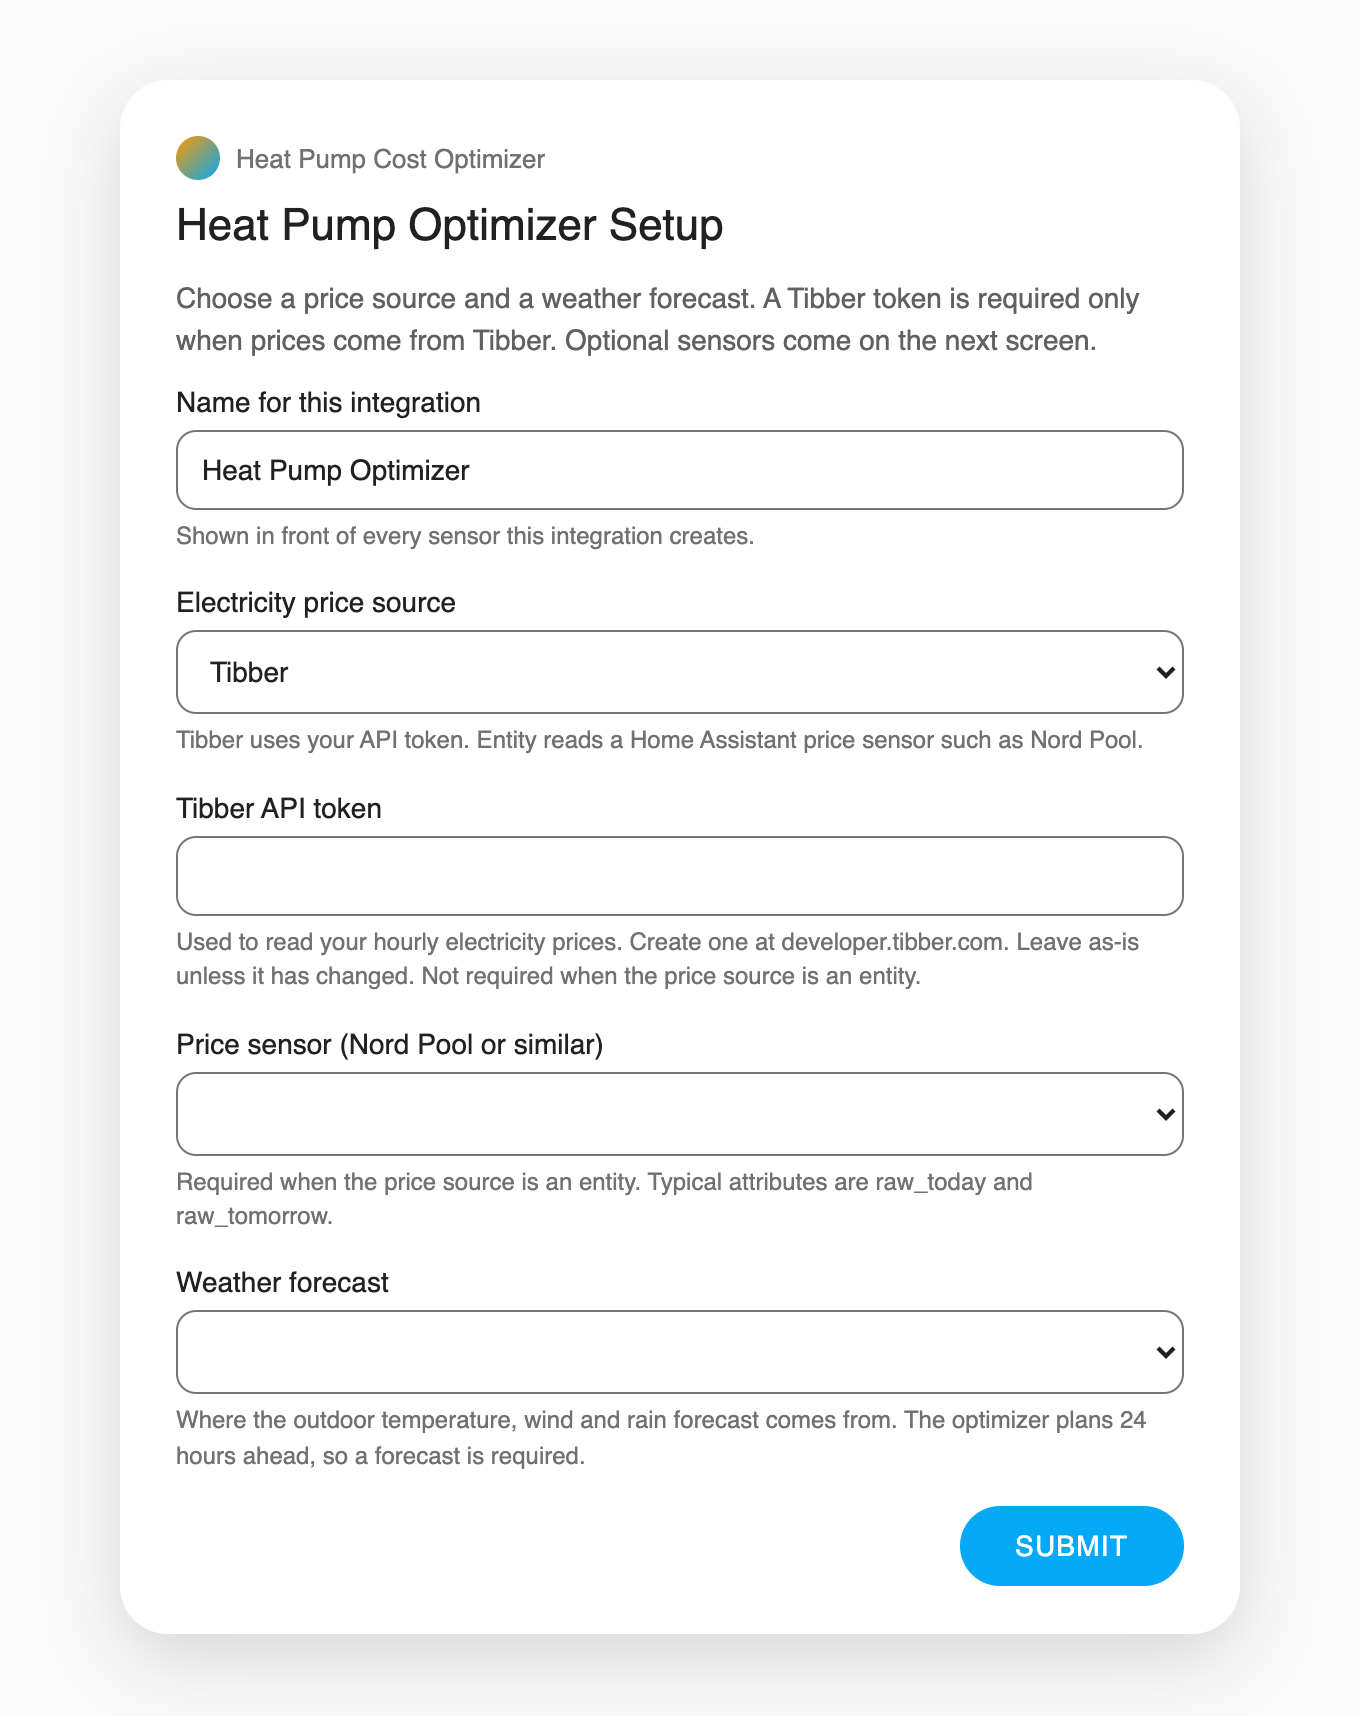
A name, where prices come from, and the weather forecast — the two required answers of the whole flow.
| Setting | What it asks |
|---|---|
| Name for this integration | Shown in front of every entity the integration creates. |
| Electricity price source | Tibber uses your API token; Price entity (Nord Pool or similar) reads a Home Assistant price sensor. |
| Tibber API token | Required only when the source is Tibber. Checked against Tibber before the flow continues — a network failure is reported as a connection problem, not as a bad token. |
| Price sensor (Nord Pool or similar) | Required only when the source is an entity. |
| Weather forecast | Required. Where the outdoor temperature, wind and rain forecast comes from. |
Screen 2 · Optional sensors
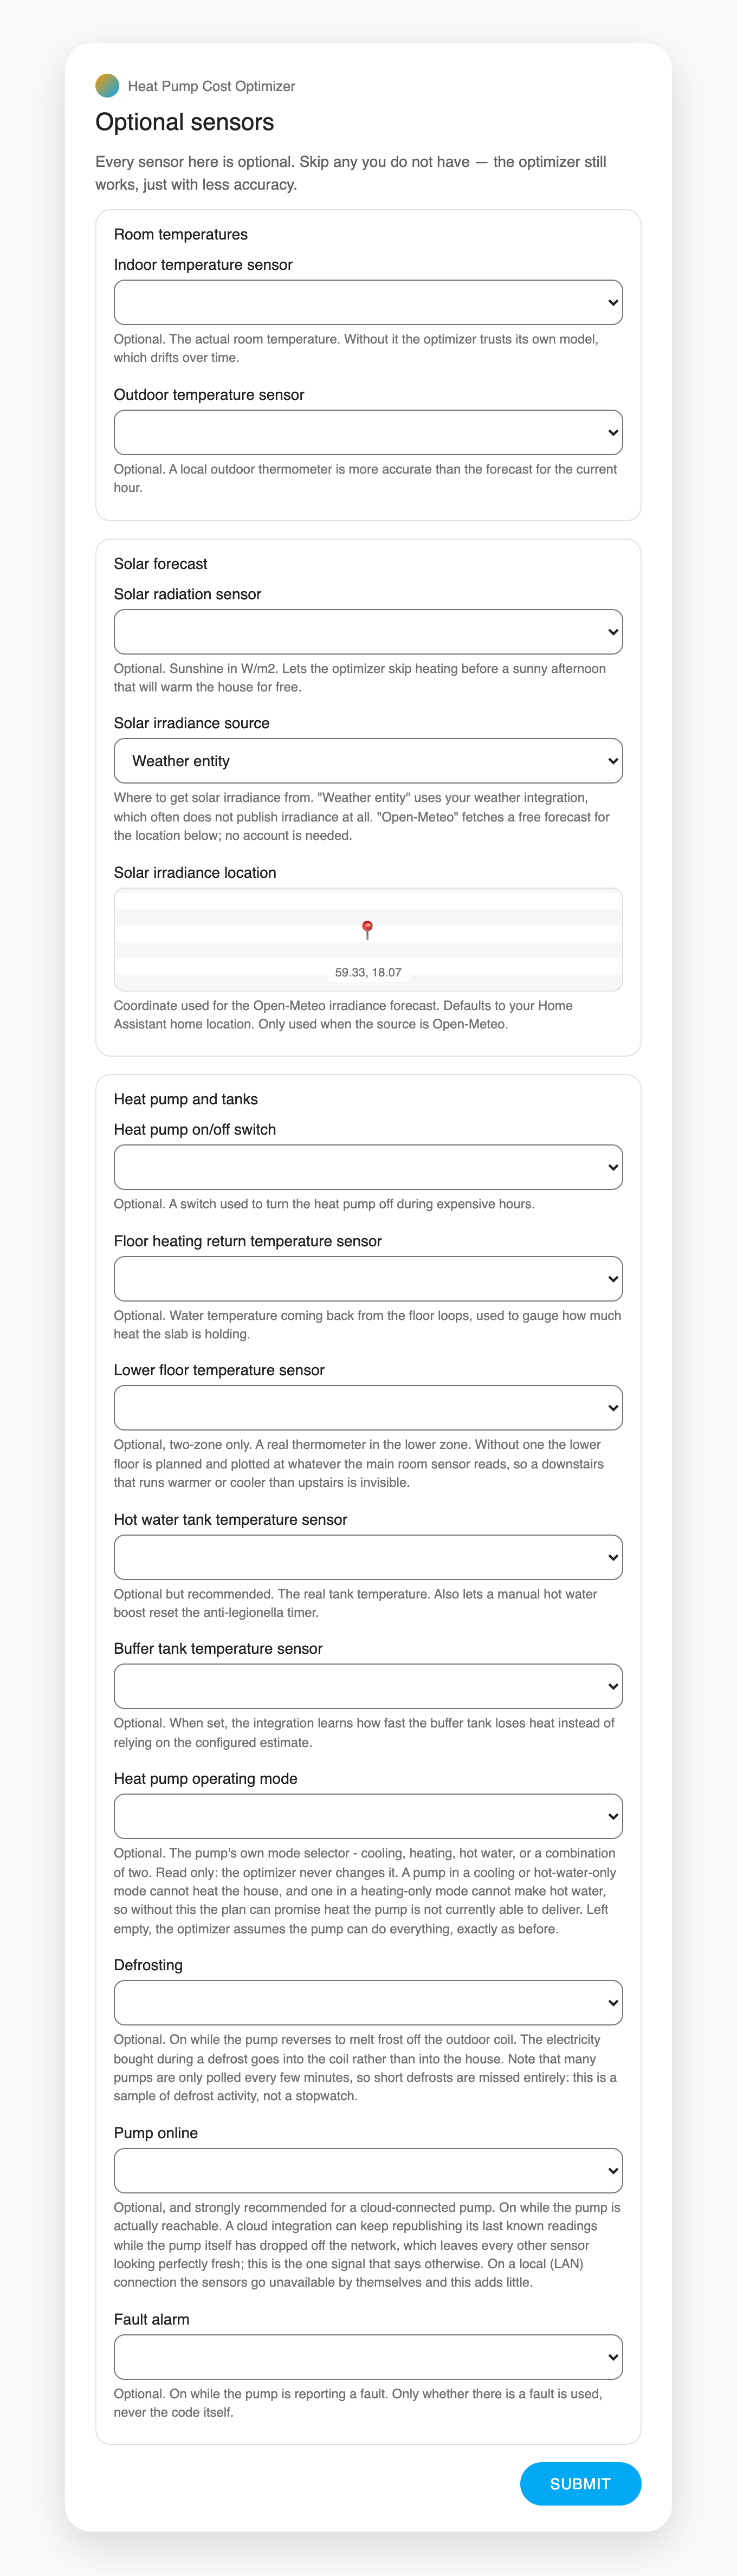
Every picker here is optional. Skip any you do not have — the optimizer still works, just with less accuracy.
The pickers sit in three groups. Room temperatures (indoor, outdoor), Solar forecast (an irradiance sensor, or a free Open-Meteo forecast for a coordinate), and Heat pump and tanks — the on/off switch, floor-loop and tank probes, and the pump's mode, defrost, online and fault signals. The indoor temperature sensor is the one worth finding first: without it the optimizer trusts its own model of the room, which drifts over time.
The choice: three ways to finish
After the two required screens the flow asks Finish setup now? — a menu with three answers:
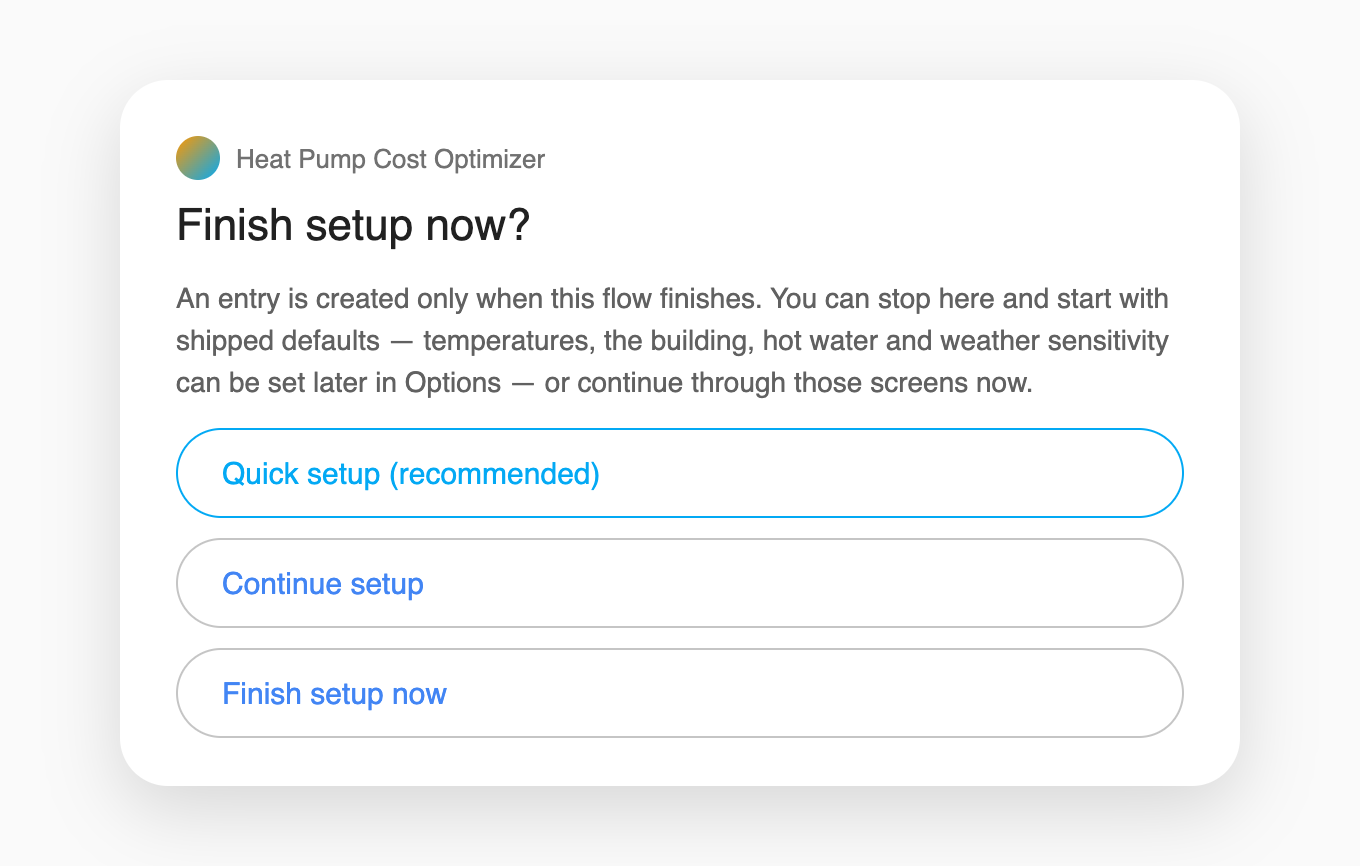
Three answers, all of which end with a working entry.
| Menu entry | What it does |
|---|---|
| Quick setup (recommended) | One page of questions about the house, then the heat pump's entities are read automatically. See below. |
| Continue setup | The full wizard: temperatures, the building, the heat pump, hot water, weather sensitivity. See below. |
| Finish setup now | Go straight to the review screen, then create the entry with shipped defaults; refine everything later in Options. |
Two things worth knowing about this menu:
- It belongs to adding a new entry, and Quick setup also to changing one. The menu itself appears only while setting the integration up, but the Quick setup questions are also reachable afterwards: open the integration and choose Configure, where Quick setup is the last entry on the first menu. It asks the same questions over the entry's existing settings, each pre-filled with the entry's own recorded answer: change an answer and submit, and the thermal model is re-derived from the questionnaire; submit without changing anything and nothing is written. The device pre-fill is not offered there, because an existing entry's entity slots are already answered — that read stays on the Pre-fill from a heat pump device page. Reconfigure reopens only the first screen and saves back onto the same entry.
Quick setup (recommended)
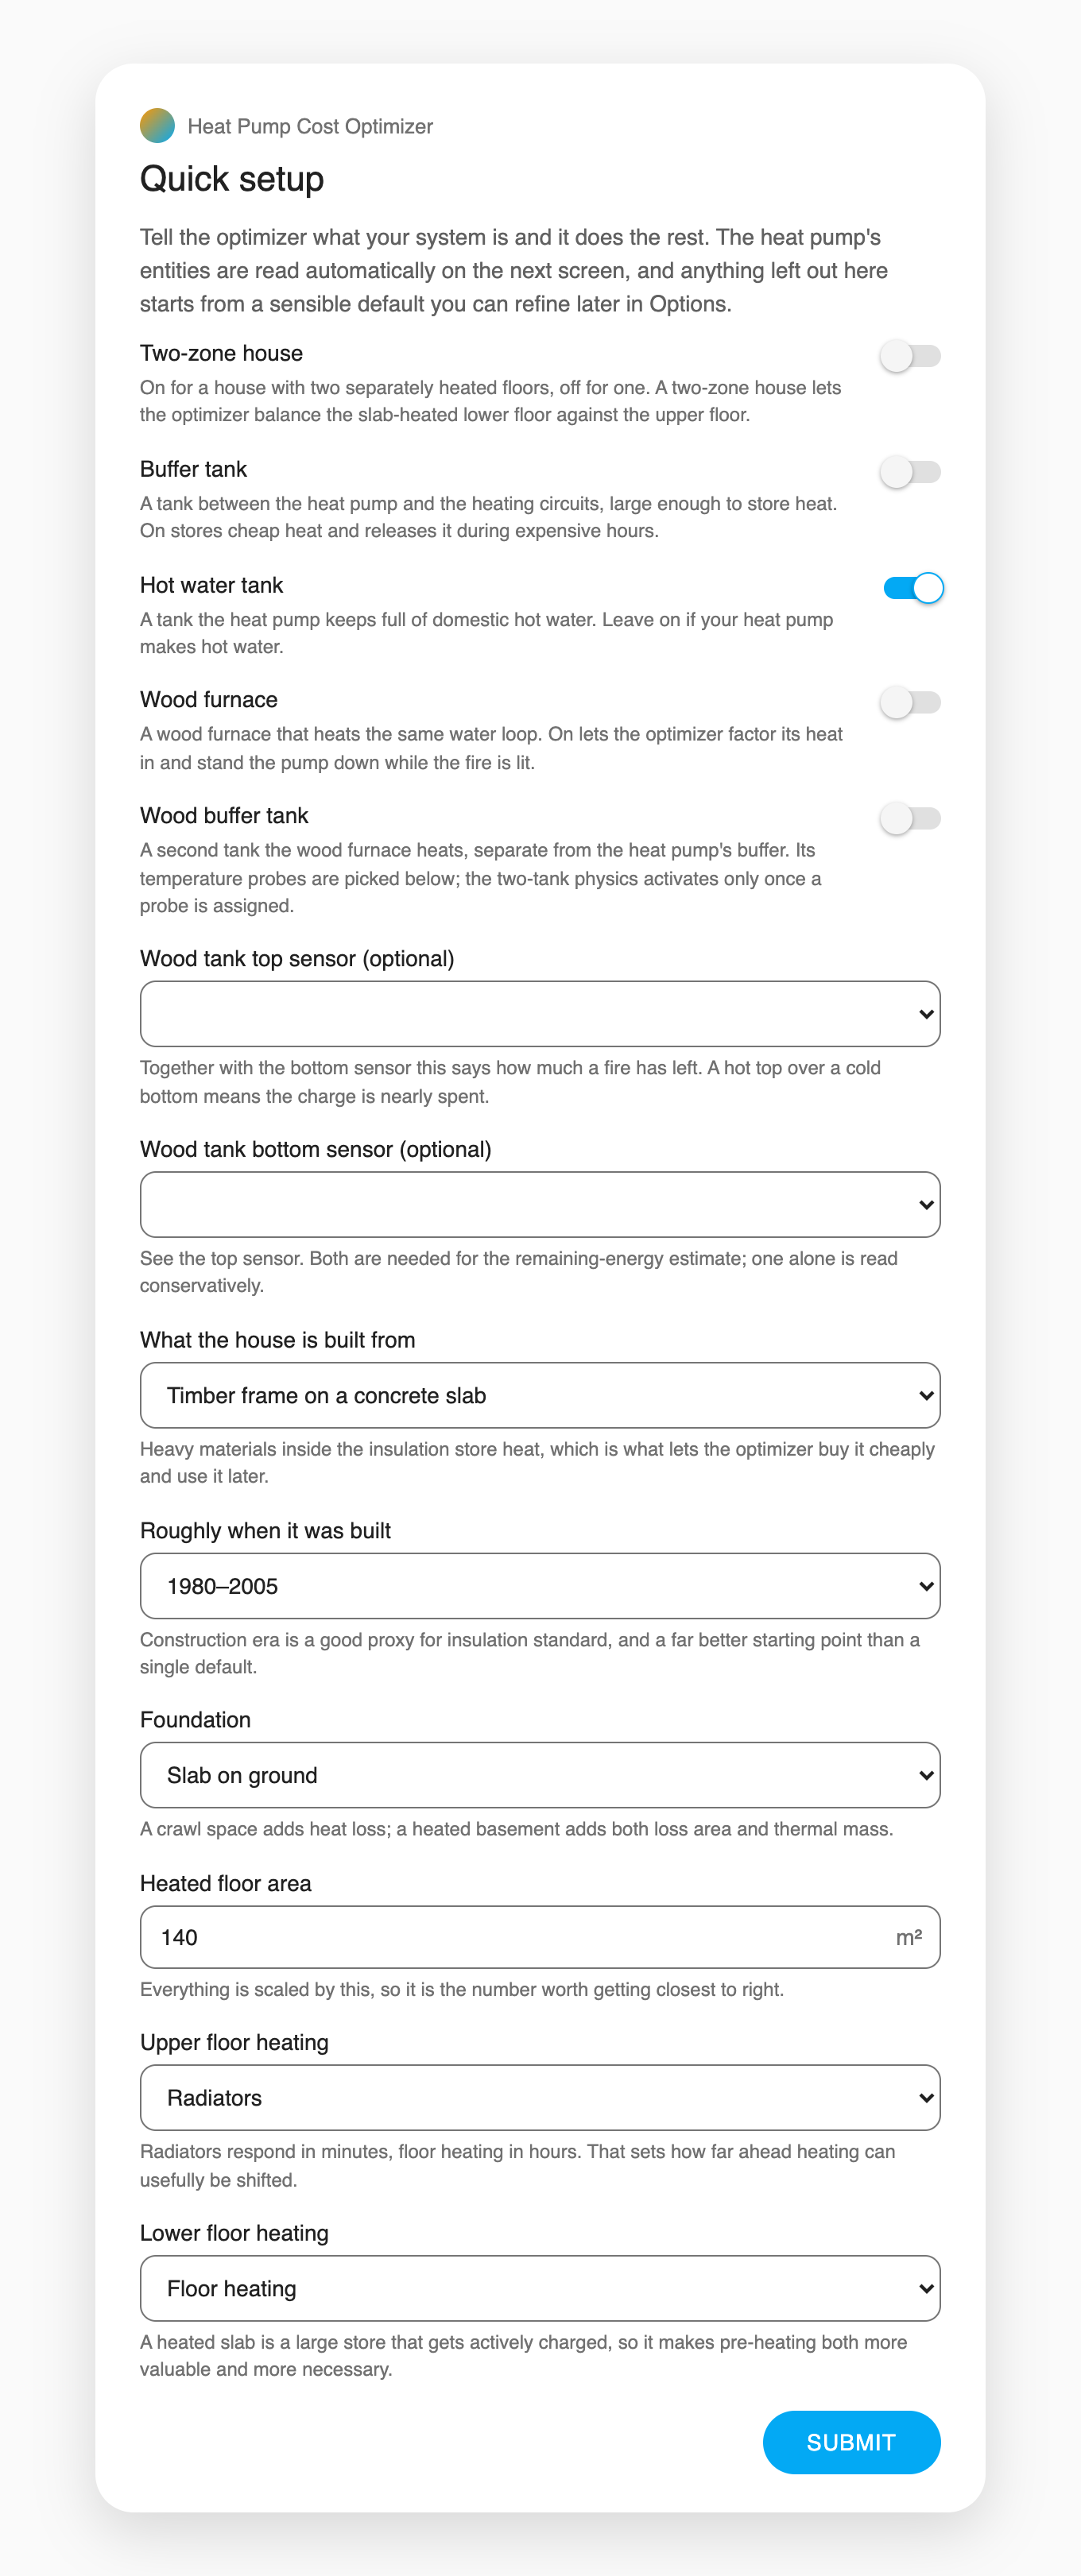
The whole house in one page: five yes/no questions, the wood-tank probes when you have that tank, and the same building questionnaire the full wizard asks.
Tell the optimizer what your system is and it does the rest. Anything the page does not ask about — or that you leave at its default — starts from a sensible value you can refine later in Options.
The five house questions
| Question | Default | What "yes" means |
|---|---|---|
| Two-zone house | off | The house has two separately heated floors. The optimizer then balances the slab-heated lower floor against the upper floor instead of treating the house as one room. |
| Buffer tank | off | A tank between the heat pump and the heating circuits, large enough to store heat. "Yes" records a store-sized tank (500 litres; the shipped default of 35 litres models a small hydraulic separator, which cannot store a night's heat). The tank is only treated as a store — holding cheap heat and releasing it during expensive hours — if your heating system page also has a throttling mixing valve. |
| Hot water tank | on | A tank the heat pump keeps full of domestic hot water. Leave it on if your heat pump makes hot water; turning it off removes hot water from the plan entirely. |
| Wood furnace | off | A wood furnace heating the same water loop. The optimizer factors its heat in and stands the pump down while the fire is lit. |
| Wood buffer tank | off | A second tank the wood furnace heats, separate from the heat pump's buffer. "Yes" records the tank's volume — and together with a throttling mixing valve, the two probes below it switch the two-tank physics on. |
The two probe pickers under the wood questions are the wood buffer's own gate — the volume alone changes nothing the model reads:
- Wood tank top sensor (optional) — with the bottom sensor, this says how much a fire has left. A hot top over a cold bottom means the charge is nearly spent.
- Wood tank bottom sensor (optional) — see the top sensor. Both are needed for the remaining-energy estimate; one alone is read conservatively.
The building questionnaire
The six questions below the toggles are the same ones the full wizard asks, and a house answered here derives the identical physics as one answered there: what the house is built from, roughly when it was built, the foundation, the heated floor area (everything is scaled by this, so it is the number worth getting closest to right), and what each floor is heated by. These set starting values only — the self-learning model refines them from how the house actually behaves. The full table of choices is in configuration.md.
The device pre-fill
Submitting the page moves straight to a screen that reads your heat pump's own entities:
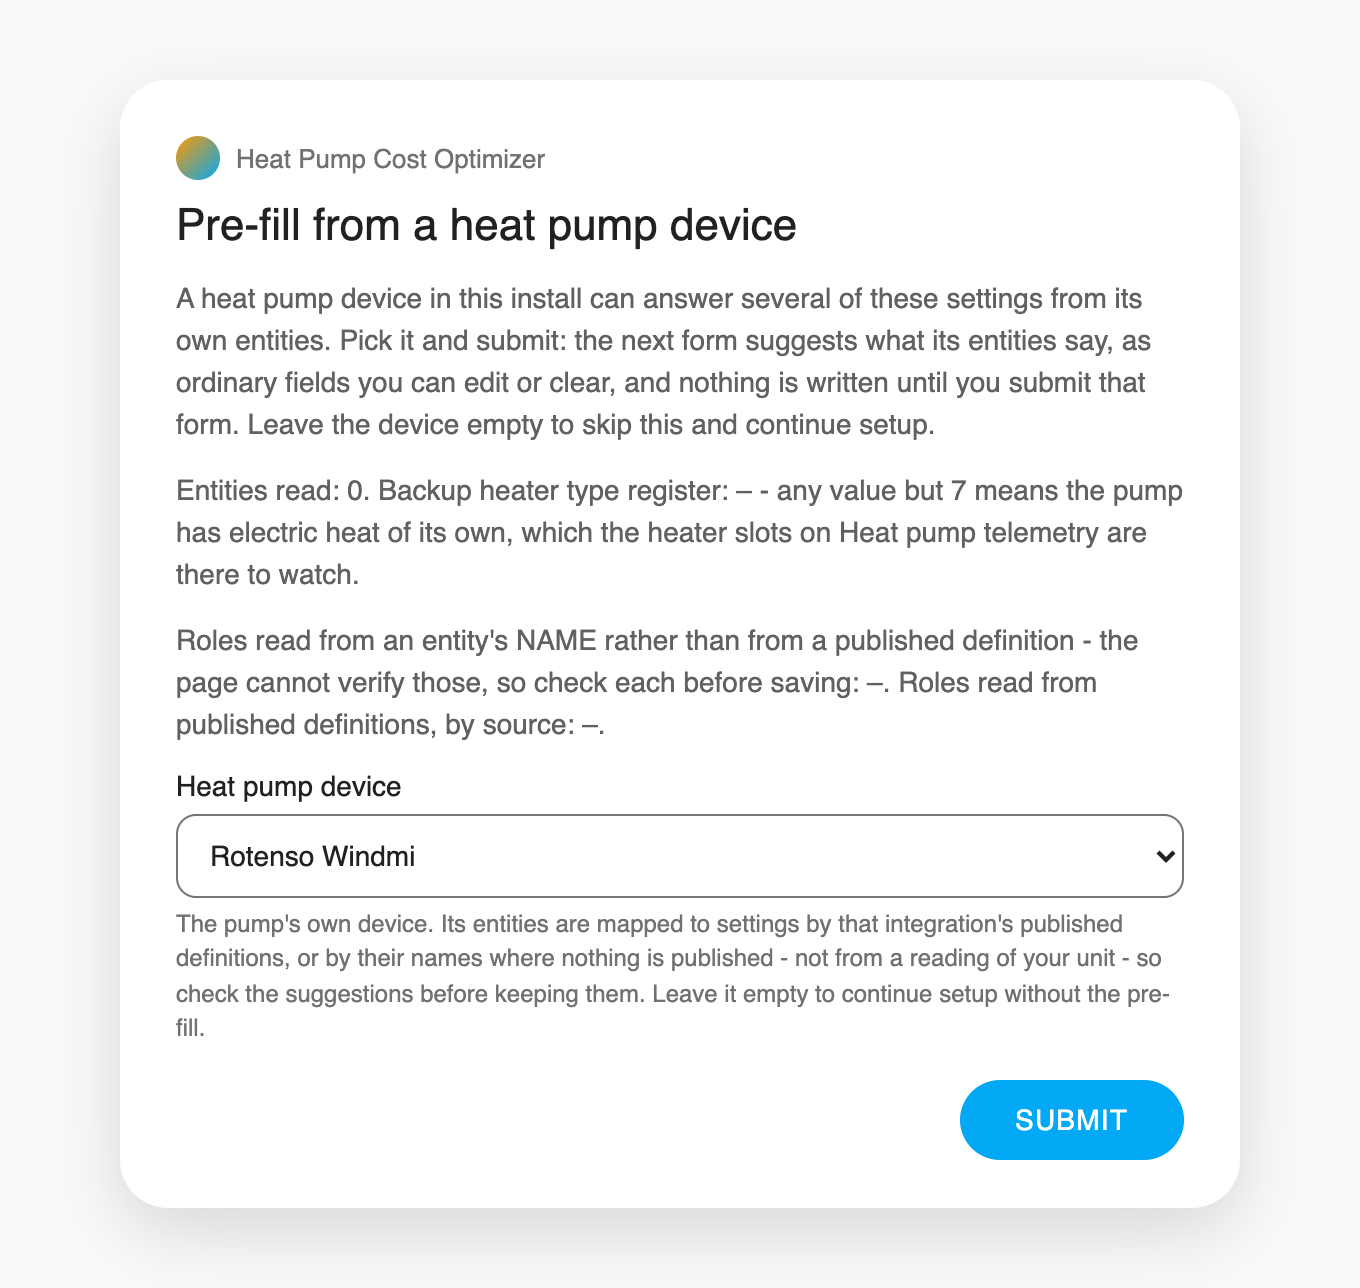
Pick the pump's device and submit — or leave it empty to skip this and continue setup.
A heat pump device in this install can answer several of the settings from its own entities: the outdoor, tank, flow and return temperature sensors, the hot water setpoint, and the pump's night-mode switch. Pick the device and submit, and the next form shows what its entities suggest:
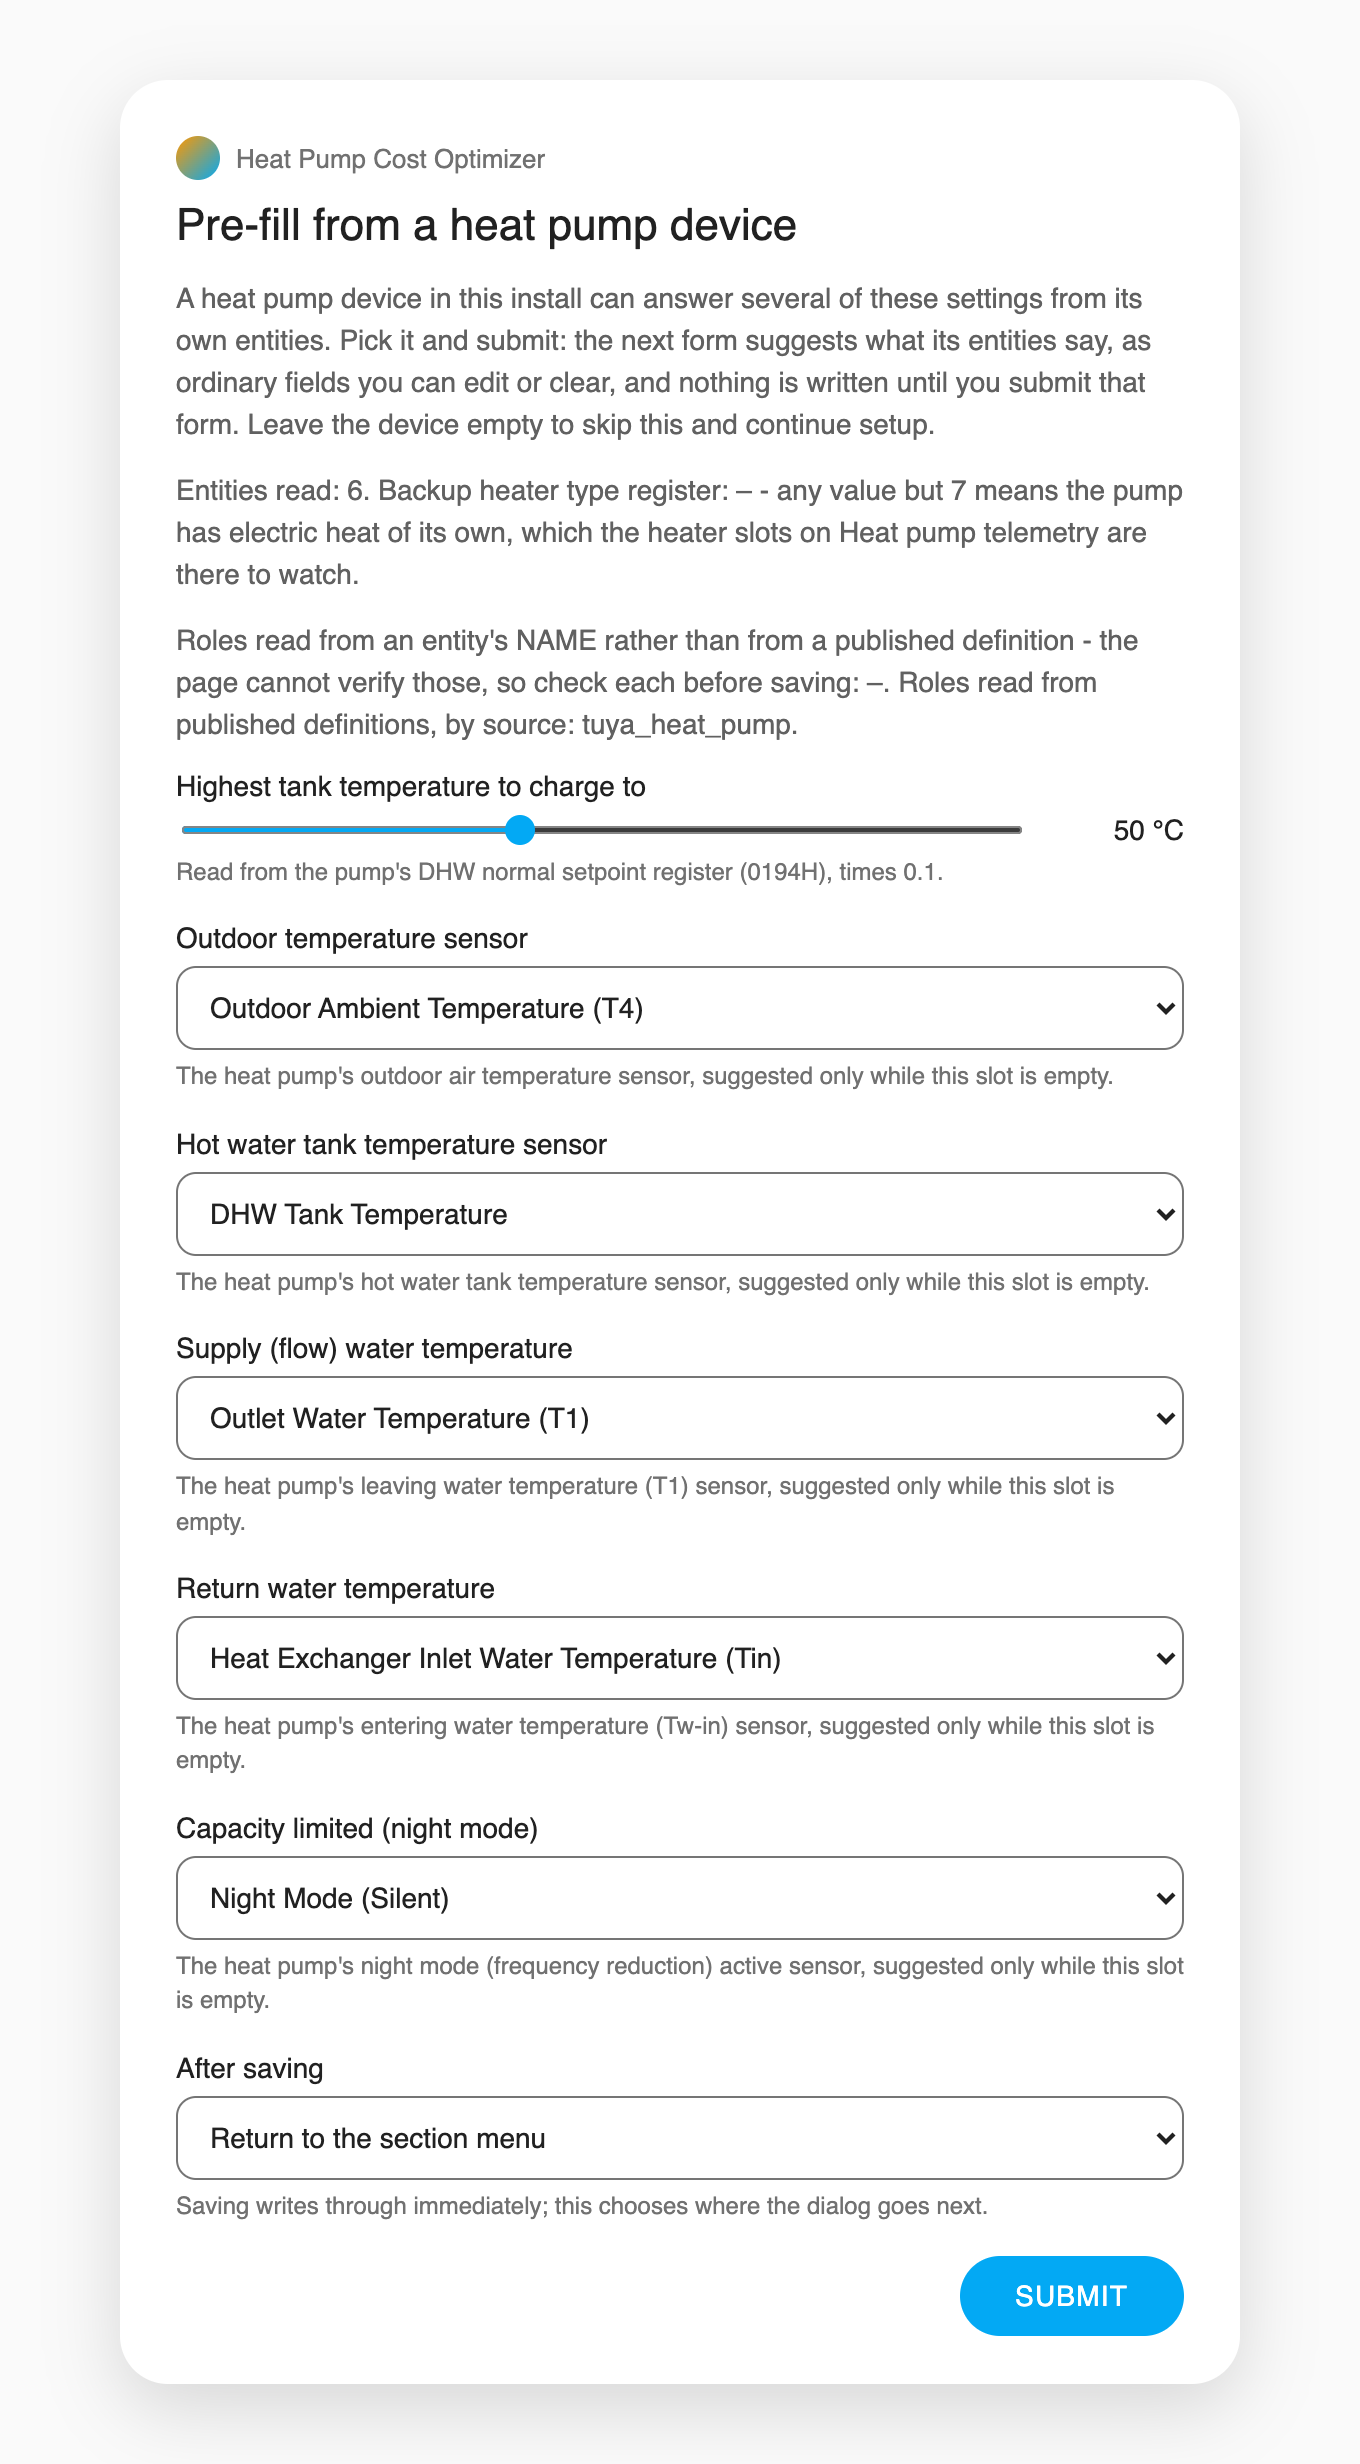
Ordinary fields you can edit or clear — nothing is written until you submit this second form. Keep what looks right, clear what does not, and the wizard continues to the menu.
The suggestions come from the device integration's published definitions or,
where nothing is published, from the entity names — so check each before
keeping it. The page itself says which is which: any role it filled from a
name is listed under the form, as role → friendly name (entity id), so a
name-matched suggestion can be checked against the entity you recognise.
The fields are the pump's own settings:
| Field | What it fills |
|---|---|
dhw_setpoint |
Highest tank temperature to charge to, read from the pump's register. |
outdoor_temp_entity |
Outdoor temperature sensor. |
dhw_temp_entity |
Hot water tank temperature sensor. |
heat_pump_supply_temp_entity |
Supply (flow) water temperature. |
heat_pump_return_temp_entity |
Return water temperature. |
heat_pump_capacity_limited_entity |
Capacity limited (night mode) switch. |
Two details worth knowing:
- On the quick path this screen always appears. Choosing Quick setup is itself a request for autodetection, so the device read runs here regardless. The Offer this pre-fill at setup switch on the Pre-fill from a heat pump device options page governs only the non-quick path, where the same screen appears — off by default — after the second screen instead.
- Leaving the device empty is a decline, not an error. Nothing is written, and the flow continues to the menu. A device whose entities fill too few settings is refused on the page rather than shown empty.
Continue setup — the full wizard
Continue setup walks the original pages. The first asks for the temperatures:
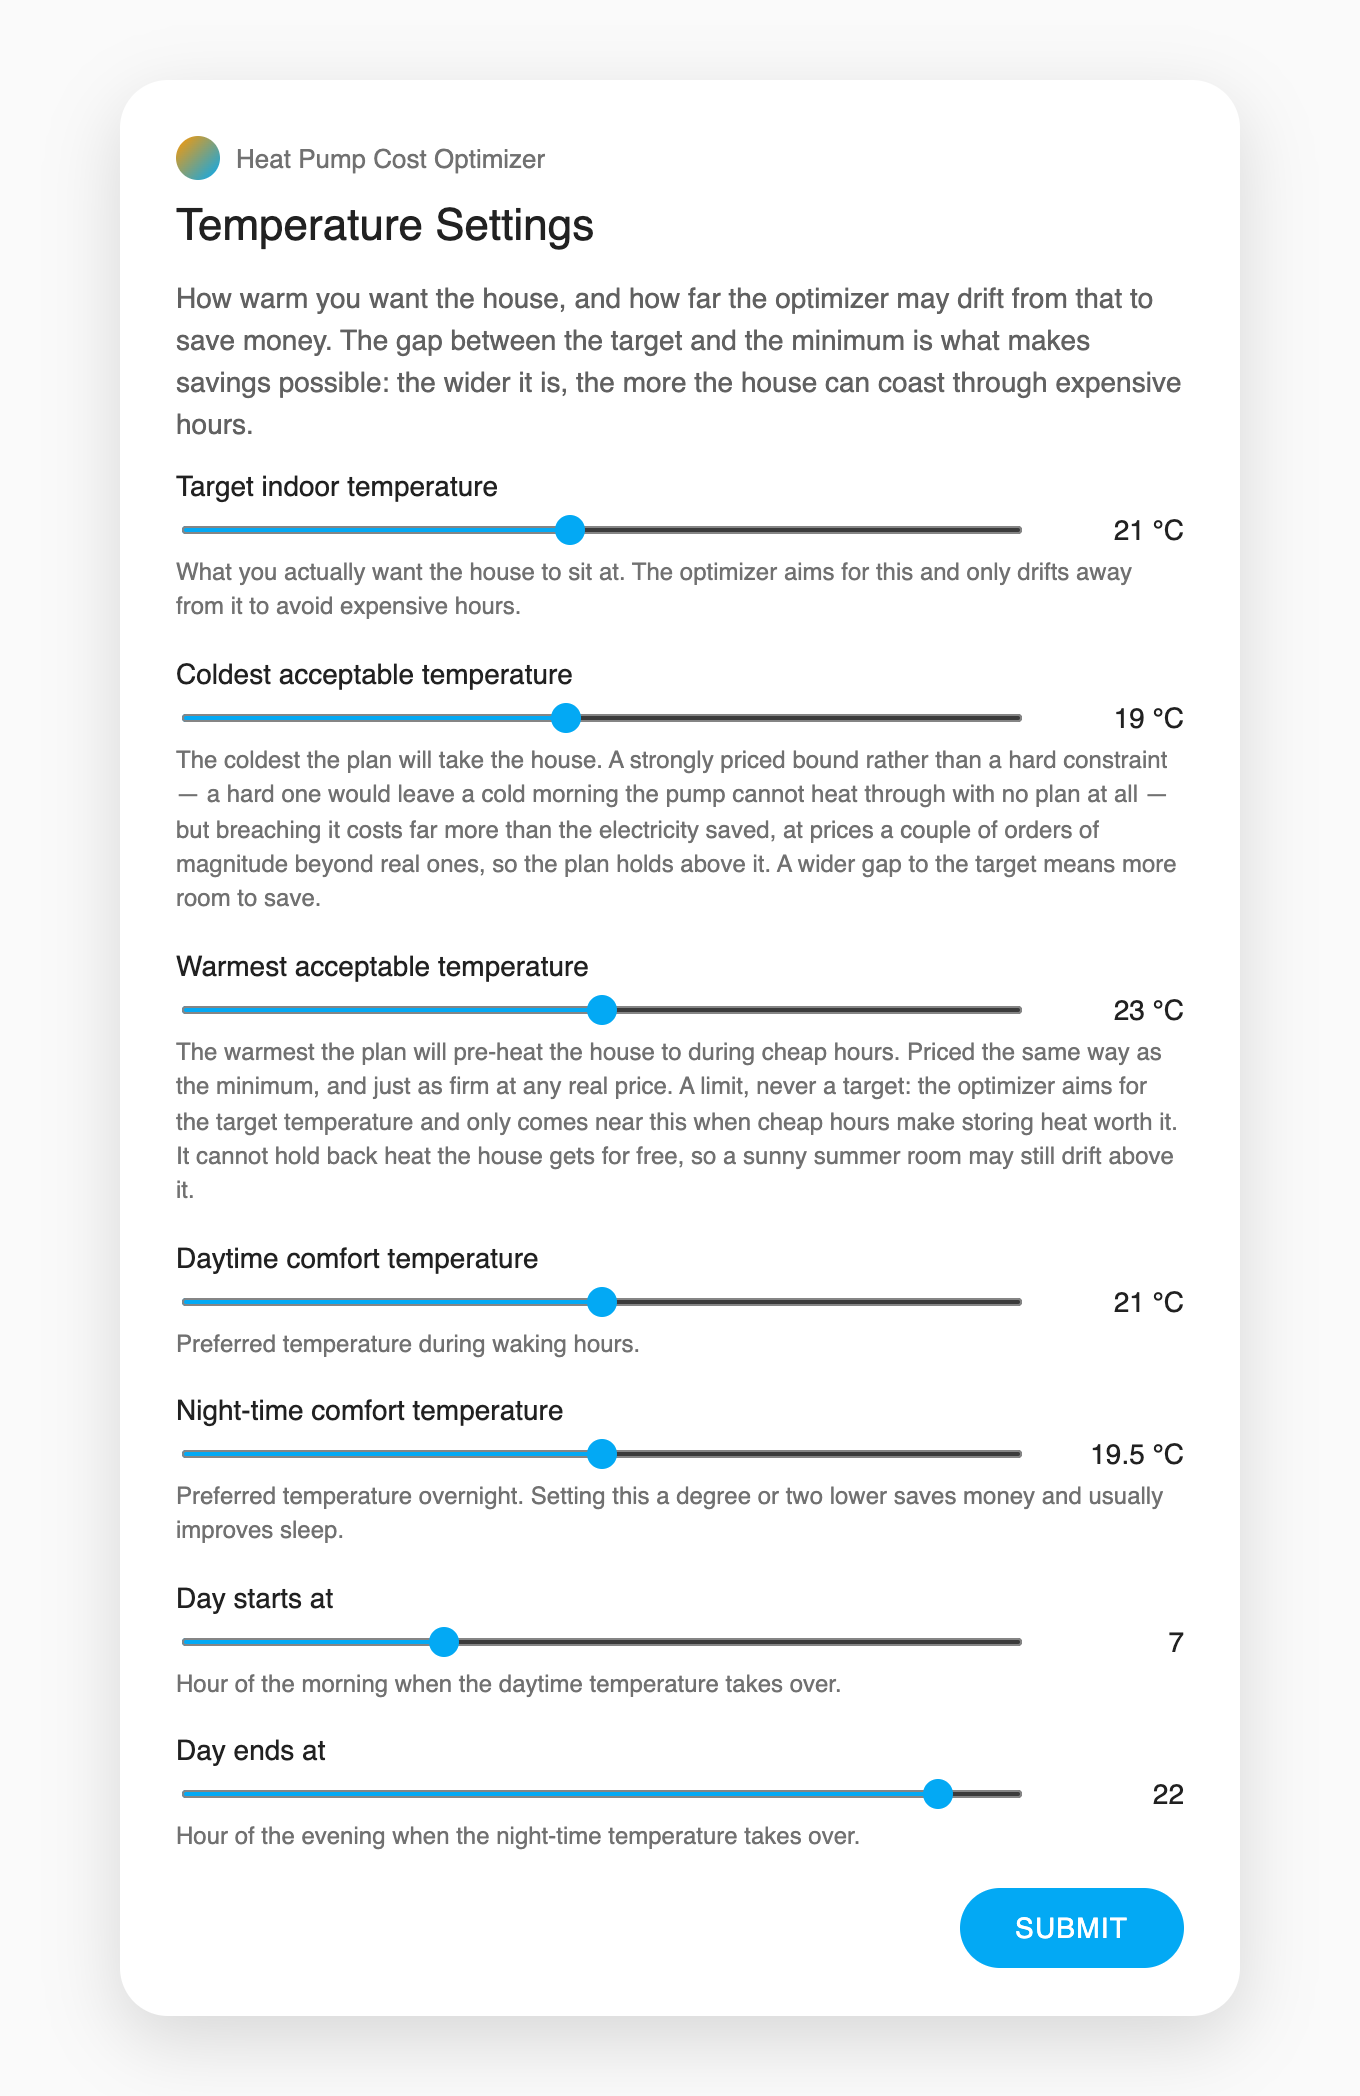
The gap between the target and the minimum is what makes savings possible: the wider it is, the more the house can coast through expensive hours.
After the temperatures the wizard asks how you want to describe your building — the same questionnaire Quick setup shows, or raw thermal values if you hold a real energy declaration — then the heat pump's nameplate numbers, hot water, and weather sensitivity. Every field, default and range on those pages is documented in configuration.md; the same checks that guard the options pages later (a minimum above the target, a night above the day temperature, and so on) run here too.
Finish setup now
Finish setup now skips the questions and creates the entry with shipped defaults once you confirm one last overview of what will be created:
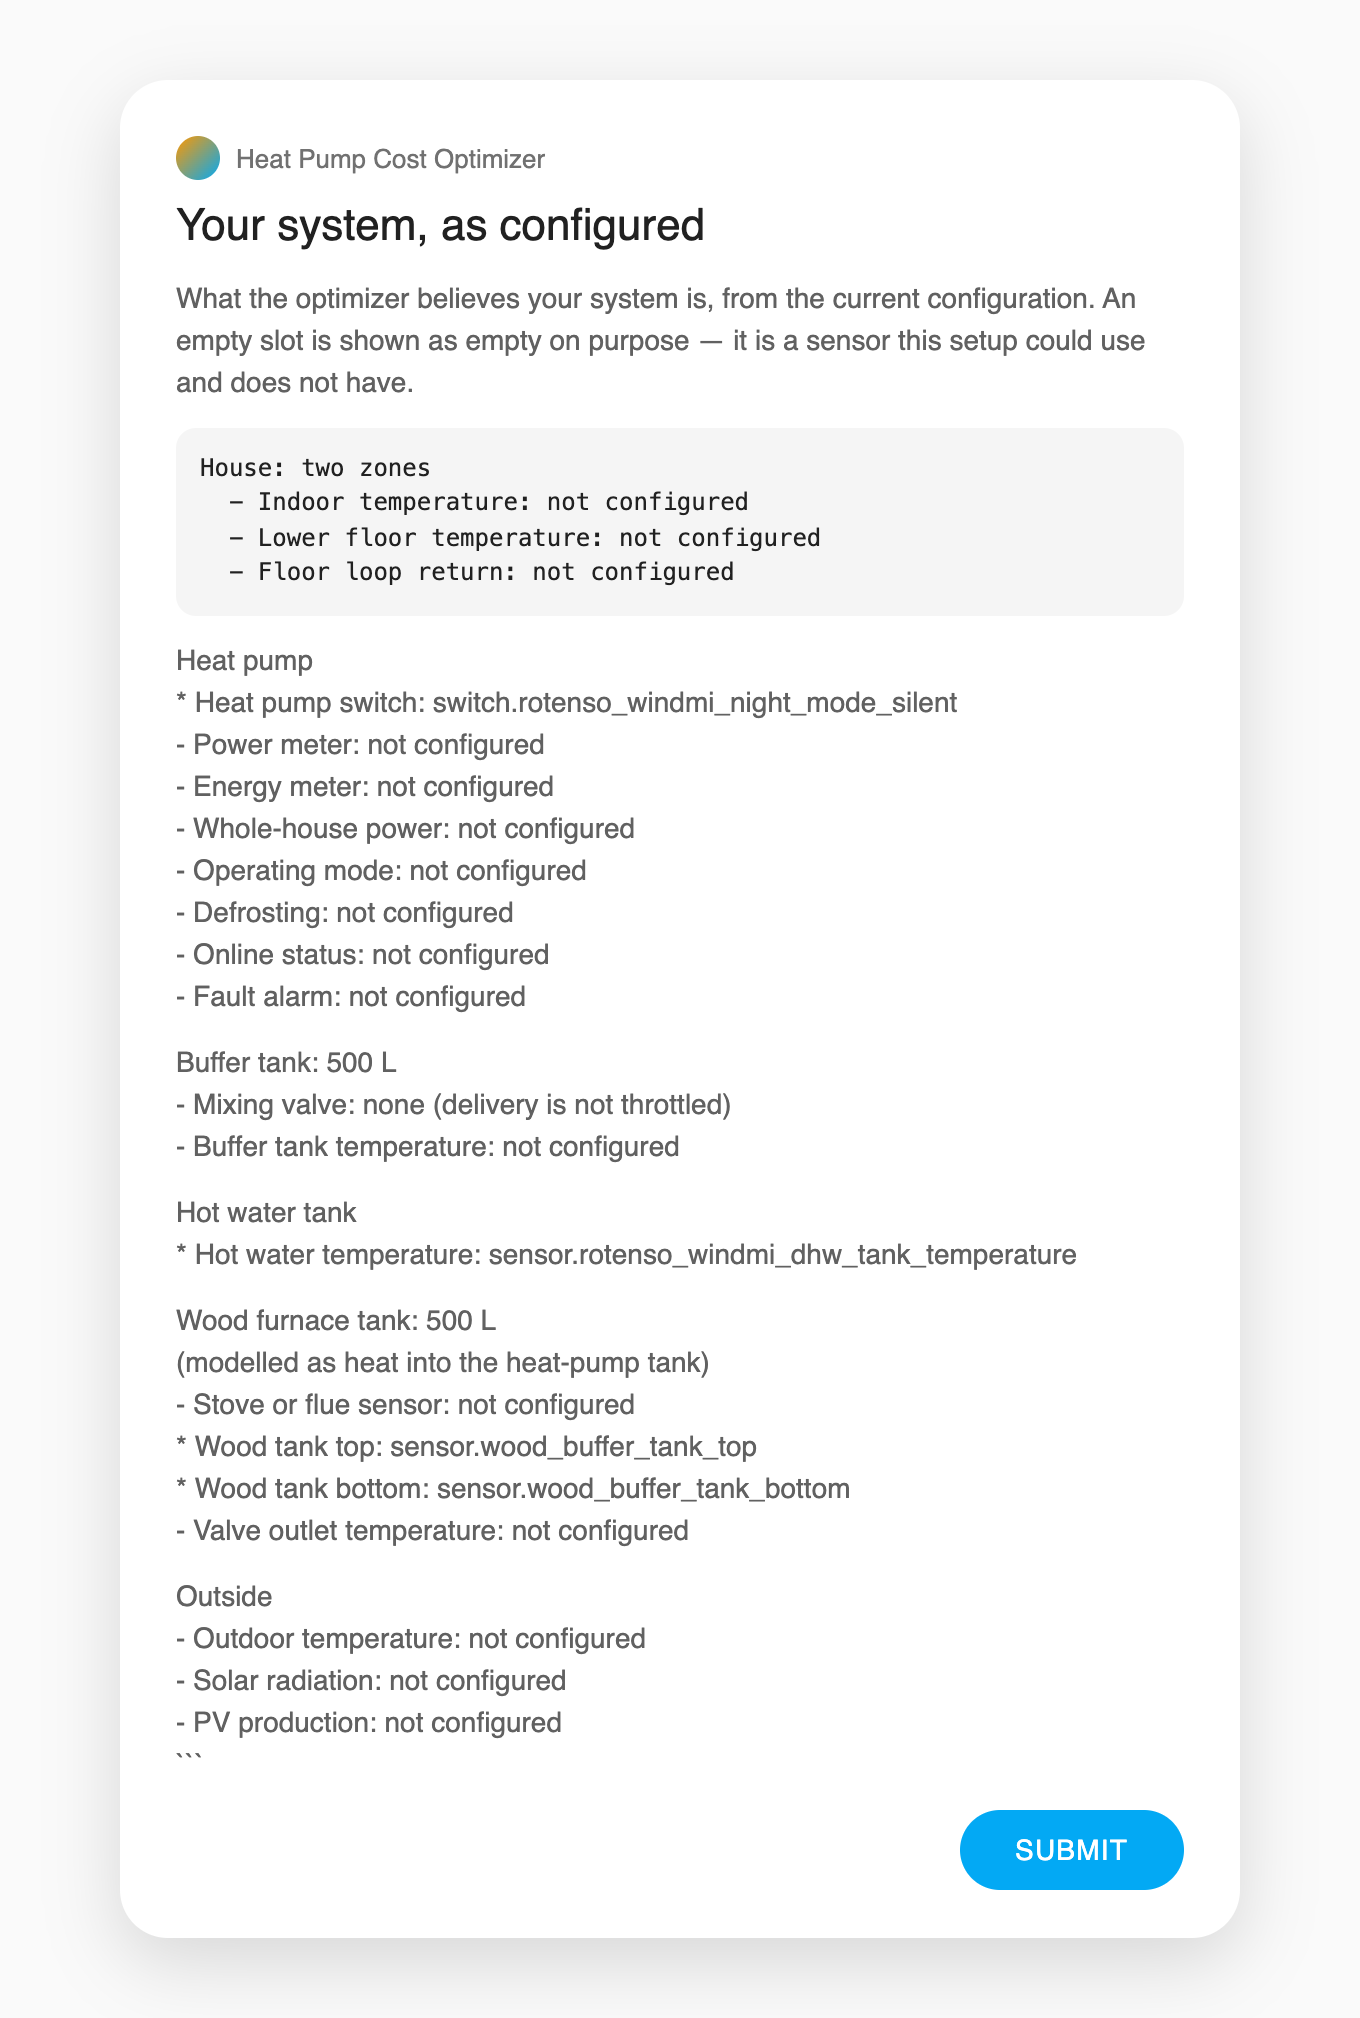
What the optimizer believes your system is. An empty slot is shown as empty on purpose — it is a sensor this setup could use and does not have.
Everything the overview shows can be changed afterwards: open the integration and choose Configure, which presents the 24 options pages described in configuration.md — with Quick setup among the everyday pages, for an install that wants to answer the house questions now — and the README.
Already have an entry?
The setup flow — including the finish-setup menu — runs when an entry is added. To change an entry that exists:
- Configure (Options) re-opens the settings pages: sensors, the building and questionnaire, hot water, tariffs, learning — everything the wizard asked and more, one page at a time. Quick setup is here too, on the first menu: the same house questions as at setup, each pre-filled with the entry's own recorded answer — change one and submit to re-derive the thermal model, or submit untouched and nothing is written.
- Reconfigure re-opens just the first screen — a rotated token, a renamed sensor, a replacement pump — and saves back onto the same entry, without walking the wizard again.
A second heat pump gets a second entry, added through the same flow as the first.
Rendered from docs/setup.md, which is the source of truth; this page changes only when that file does.